加装硬盘
前面介绍了,装好aira2自启动!《hg556a刷了官方openwrt安装aria2,增加自启动》无非就是想实现离线下载嘛,既然要下载,那挂上移动硬盘和U盘那是必须的嘛,但官方固件没有集成这些挂载点的WEB管理页面,那就自己装吧!
方法是原文参考:http://hi.baidu.com/opwrt/item/cc475e12c8923cf99d778a61
openwrt 自动挂载U盘、移动硬盘
步骤
opkg update
opkg install kmod-usb-core
opkg install kmod-usb-ohci #安装usb ohci控制器驱动
#opkg install kmod-usb-uhci #UHCI USB控制器
opkg install kmod-usb2 #安装usb2.0
opkg install kmod-usb-storage #安装usb存储设备驱动
opkg install kmod-fs-ext3 #安装ext3分区格式支持组件
opkg install mount-utils #挂载卸载工具
opkg install ntfs-3g #挂载NTFS
opkg install kmod-fs-vfat #挂载FAT
opkg install block-mount
opkg install fdisk
opkg install usbutils #安装了这个后可以用 lsusb
#U盘,移动硬盘自动挂载脚本
编辑/etc/hotplug.d/block/10-mount (用winscp工具连接路由,编辑文件)
___________________________以下是文件内容_________________________________
#!/bin/sh
# Copyright (C) 2009 OpenWrt.org (C) 2010 OpenWrt.org.cn
blkdev=`dirname $DEVPATH`
if [ `basename $blkdev` != "block" ]; then
device=`basename $DEVPATH`
case "$ACTION" in
add)
mkdir -p /mnt/$device
# vfat & ntfs-3g check
if [ `which fdisk` ]; then
isntfs=`fdisk -l | grep $device | grep NTFS`
isvfat=`fdisk -l | grep $device | grep FAT`
isfuse=`lsmod | grep fuse`
isntfs3g=`which ntfs-3g`
else
isntfs=""
isvfat=""
fi
# mount with ntfs-3g if possible, else with default mount
if [ "$isntfs" -a "$isfuse" -a "$isntfs3g" ]; then
ntfs-3g -o nls=utf8 /dev/$device /mnt/$device
elif [ "$isvfat" ]; then
mount -t vfat -o iocharset=utf8,rw,sync,umask=0000,dmask=0000,fmask=0000 /dev/$device /mnt/$device
else
mount /dev/$device /mnt/$device
fi
if [ -f /dev/${device}/swapfile ]; then
mkswap /dev/${device}/swapfile
swapon /dev/${device}/swapfile
fi
;;
remove)
if [ -f /dev/${device}/swapfile ]; then
swapoff /dev/${device}/swapfile
fi
umount /dev/$device
;;
esac
fi
________________________________文件尾_________________________________
chmod 777 /etc/hotplug.d/block/10-mount #加运行权限
这样就完成了自动挂载
插入USB硬盘后就会自动挂载
挂载Swap分区
###在/mnt/sda1/下创建一个64M的交换文件
dd if=/dev/zero of=/mnt/sda1/swapfile bs=1024 count=62142
###将这个交换文件用作Swap分区
mkswap /mnt/sda1/swapfile
###启用活动分区
swapon /mnt/sda1/swapfile
###停止
swapoff /mnt/sda1/swapfile
openwrt 格盘
opkg update
opkg install e2fsprogs #安装格盘软件
mkfs.ext4 /dev/sda1 #格etx4
mkfs.ext3 /dev/sda1 #格etx3
mkfs.ext2 /dev/sda1 #格etx2
挂载windows共享文件 cifs
opkg install kmod-nls-utf8
opkg install kmod-fs-cifs
mkdir /mnt/share
mount -t cifs //192.168.1.2/tool /mnt/share -o username=administrator,password=123456,,nounix,noserverino,iocharset=utf8
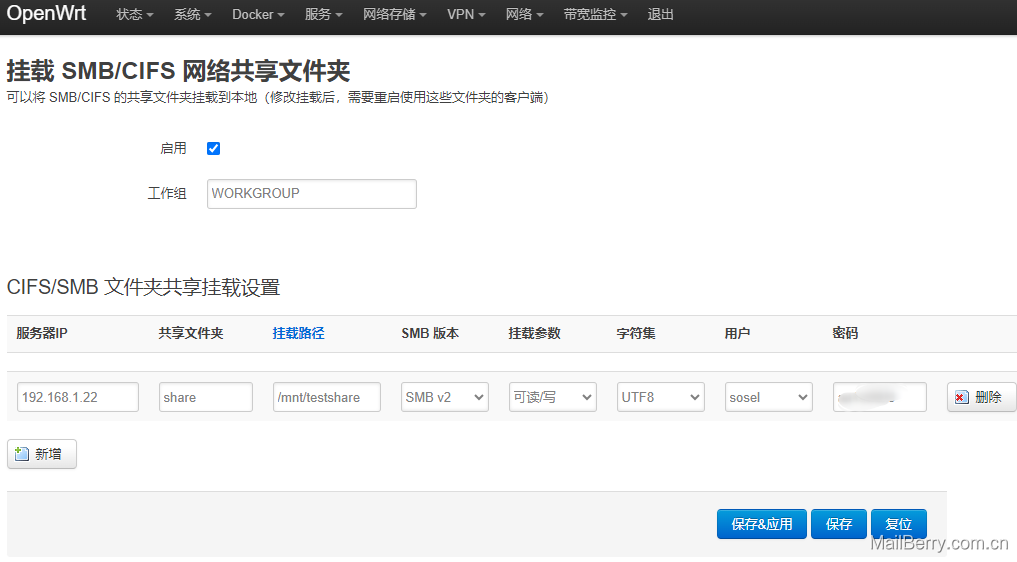
设置好后如图,luci管理页面多出了个挂载点菜单了
免去了SSH敲命令的麻烦了


暂无评论